
Unique gifts made of wood: Wooden stars

If you want to surprise your family and friends on a special occasion, why not give them something made entirely with your own hands? Perhaps an extraordinary wooden ornament that you have cut out with your chainsaw is just the right choice? In recent years, in addition to professional scroll-sawyers, chainsaw carving has also become a hobby for enthusiasts.
We will show you how to saw a wooden star in a few simple steps.
Choosing the right wood
It is not easy to say which wood is best for carving. They all have their advantages and disadvantages. Soft woods, such as larch or pine, are very weather-resistant, but they tend to exude resin.
As an unwritten rule, if wood is worked correctly, there are basically no restrictions on the choice of wood. So find the wood you like best. Poplar, oak and various fruit trees are especially popular.
Kaitseriietus
Hobby carvers also need the right safety equipment when working with a chainsaw. Protection starts with the head. Always wear safety goggles or a visor, and, to protect your ears, ear plugs or ear defenders, for example.
If you work in the forest, a safety helmet is also necessary. Your hands and legs should be suitably protected too. Wear work gloves, cut-protection trousers and boots.
Note that some countries have special requirements for safety equipment. Particular attention should also be paid to your equipment's instruction manual.

The right tool
When it comes to detailed wood carving, STIHL's Carver-type saws are the right choice. Special carving equipment has low vibration and kickback. The narrow guide-bar tip allows fine contours and precise cuts to be made.
Light, medium-power-class chainsaws with a STIHL Rollomatic guide bar are the right choice for making the straight cuts of a wooden star. Of course, other chainsaws will do the job too!

Step 1: what do you need?
- A round log 30-40 cm in diameter
- Saagimispukki
- A load strap for tensioning
- Kettsaagi
- Marking chalk for drawing lines
- A star shape drawn on cardboard and cut out
- A folding rule or a ruler
- Turvavarustust
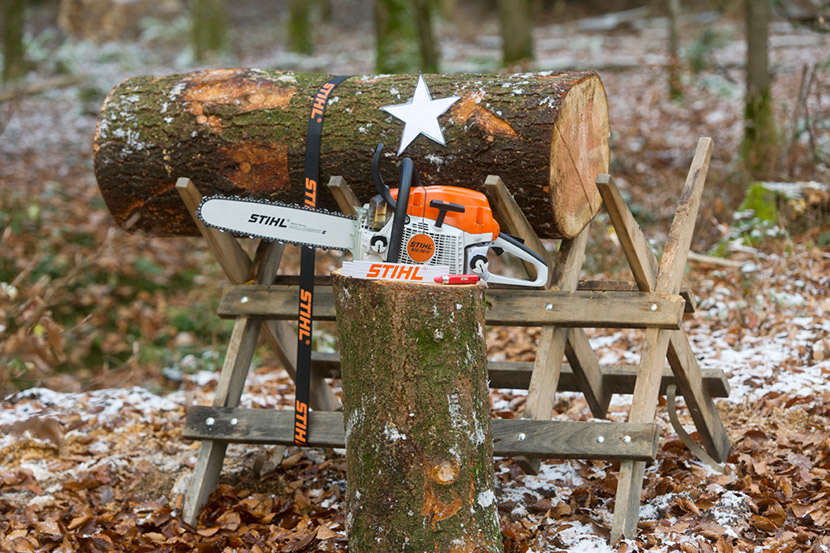
Step 2: drawing the shape.
Before starting the saw, make sure the log is firmly fastened to the trestle with the strap.
Using the marking chalk, draw the outlines of the star so that you know where to start sawing later.
Place the cardboard star shape on the narrower end of the log. Do not worry if the star is smaller than the diameter of the wood. Use a ruler or folding rule and extend each point all the way out to the bark.

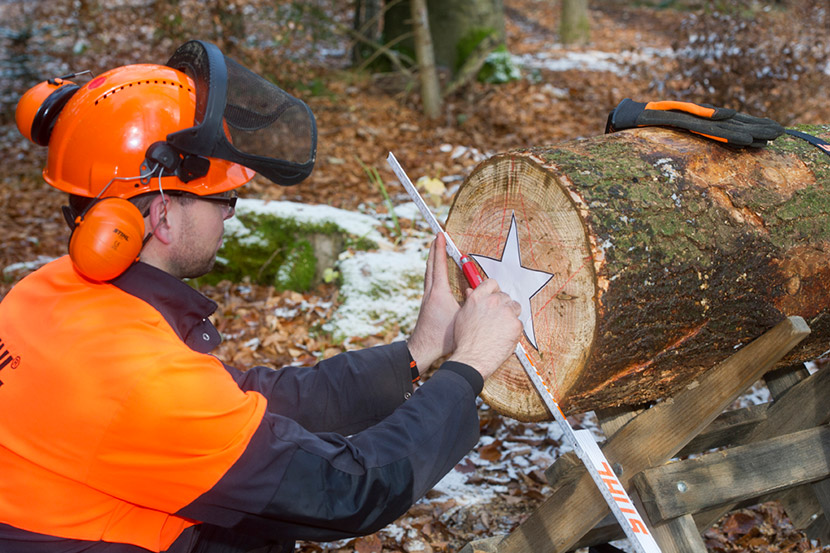
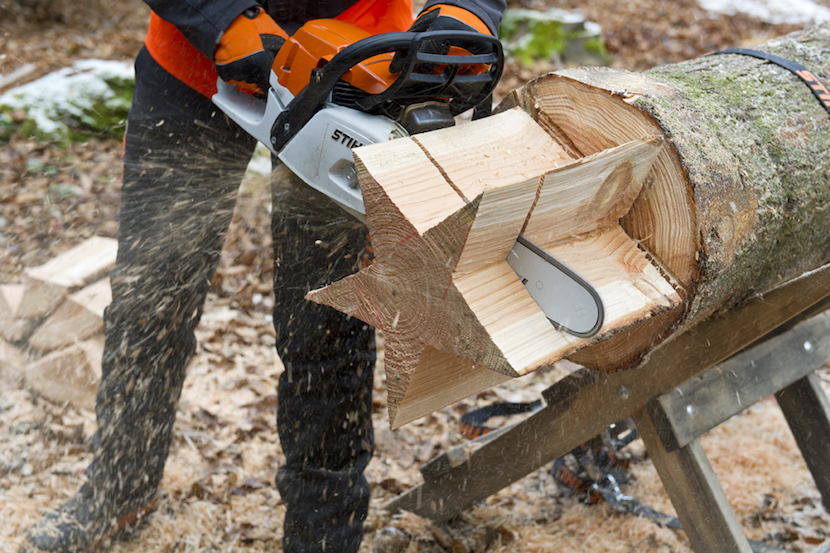
Now is the right time to start the saw! First saw out the main lines of the star, starting from the top of the log and sawing up to where the lines of the star intersect. Try to keep the guide bar as parallel as possible so as not to spoil the next cutting point.
Turn the log and make the next cuts with the second point of the star. Keep turning and cutting the log until the outer contours of the star have been sawn out.

Saw into the log along the vertical lines. Turn the log so that you have a comfortable working position.

Now make a few cuts from further out and remove the excess pieces of wood.

Step 3: cut a star of a suitable thickness.
Once the base shape is ready, you can cut out the star shape. It can be as thick or as thin as you like. From one base you can saw out several stars.
Step 4: finishing the star.
Finishing ensures that the star stays beautiful for a long time. If you used dry wood and keep the star indoors, you are already finished! If you used semi-dry wood, treat it with an indoor varnish or another natural product.
If you plan to keep the star outdoors, use a special outdoor varnish.

Source: http://blog.stihl.com/practical-knowledge/2013/12/one-kind-presents-made-wood-star/